
Pajero II Workshop Manual 1991 · Кузов · страница 42 из 52 · Открыть оригинал PDF ↗
Текст распознан со скана. Числа и обозначения можно сверить с оригиналом ниже.
CONTROLUNIT
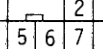
Check for continuity between terminals under the conditions
describedbelow
Таблица в оригинале

Распознанный текст таблицы — требует сверки с оригиналом
| IBattery_voltage | Terminal |
|---|---|
| When there is | no current |
| When there is | current |
NOTE
indicates that there is continuity between the terminals
indicatesthat therecontinuity whenthe (+ )
connected to the tester plus terminal, and the (-) is connected
to the tester minus terminal
(31indicates terminals to which battery voltage is applied.

SERVICE POINTS OF INSTALLATION 12. INSTALLATIONOFREARDRAINHOSE/11.FRONT DRAIN HOSE
(1) Tie the rope that was used during removal to the end
of the drain hose, and wind tape around it so that there
isnounevenness_
(2)Pull the ropeto pull the drain hose through:
(3) Pull the drain hose until the protruding length from the
grommet is as shown inthe figure.
(4) Align the rear drain hose (RH) with the body hole with the
marking at the bottom
(Vehicles builtfromJune 1991)
5. INSTALLATIONOF MOTOR ASSEMBLY
When replacing the motor assembly,open the sunroof
glass approximately 200 mm (7.9 in.), set the hole of the
intermittent gear So that it is aligned between the teeth of
the motor assembly transmission gear,and then install
the motor assembly
PWNJE9O8O-A
Оригинальная страница руководства
